DKIM (DomainKeys Identified Mail) is an email authentication protocol that helps prevent phishing, email spoofing, spamming, and other cyber attacks that use emails to break into an organization’s or individual’s system. It legitimizes the emails so that recipients are aware that the email originated from a particular organization.
For detailed information on DomainKeys Identified Mail, read more on What is DKIM?
NOTE: Before you can digitally sign your emails from Zendesk, you will need to update the Domain Name System (DNS) records of your domain so that Zendesk can verify your signatures.
This article will be a step-by-step process to setting up DKIM on your Zendesk account, making your emails more secure and spoof-free.
We will break it into two simple steps:
-
Adding your Domain Key to the DNS records
- Log in to your domain registrar’s control panel.
- Find ‘Change DNS records’ and click on it. Depending on your domain registrar, it may also be called ‘DNS Management’, ‘Name Server Management’, or ‘Advanced Settings’.
- Look for the option ‘Create CNAME records’.
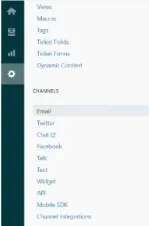
- Head to Zendesk and navigate to ‘Admin > Channels > Email’.
- Go to ‘Custom Domain for DKIM’.
You’ll find two CNAME records, namely:zendesk2._domainkey.your_email_domain.comzendesk2._domainkey.zendesk.com - Copy these and enter them into your Domain Registrar’s panel, which you opened earlier, and ‘Publish’ them.
- Enabling digital signatures in Zendesk
-
- On Zendesk, click ‘Manage’ and select ‘Email’ from ‘Channels’.
- Scroll down to the option called ‘Custom Domain for DKIM’ and select the ‘Enable’ option.
- Click on ‘Save’, and the setup is complete.